
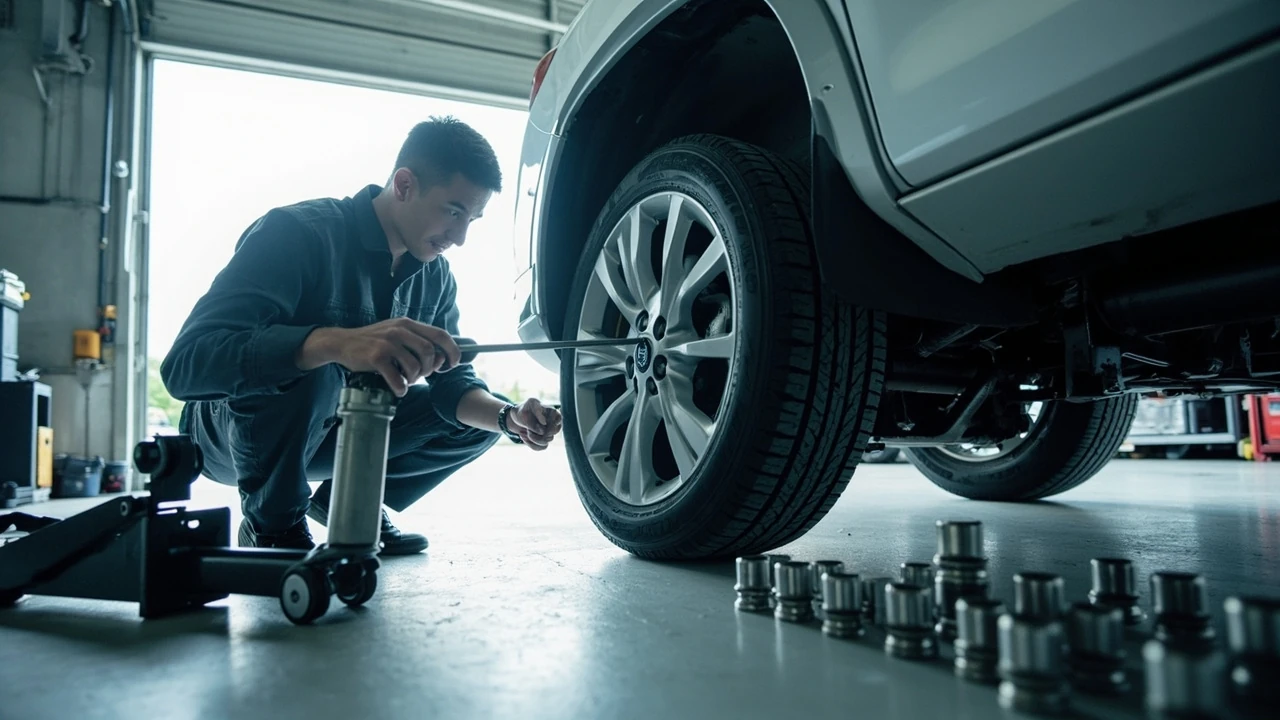
Flat tire repair starts with identifying the cause and damage
A tire that is low on air or completely flat should not be treated the same way every time. A nail in the tread may leave the tire repairable, while a split sidewall, a damaged wheel, or a tire with worn-out tread usually requires a different solution. The safest approach is to stop driving, protect the area around the vehicle, inspect what caused the loss of pressure, and determine whether the tire and wheel are fit to continue carrying the vehicle.
Flat tire repair has two separate goals. The first is to restore enough air pressure to move the vehicle safely to a repair location. The second is to fix the source of the leak in a way that restores reliable operation. Inflating a tire may solve the immediate problem, but it does not repair a puncture, damaged valve, bead leak, or wheel problem.
This guide explains the common types of tire damage, the difference between a temporary roadside fix and a permanent repair, and the point when replacing the tire is safer than trying to repair it. It also covers how to change a tire, what to inspect before driving away, and how to reduce the chance of another flat.
| Situation | What usually happens | Likely next step |
|---|---|---|
| Nail or screw in the tread | Air escapes through a puncture in the tread area | Inspect the tire and wheel, then consider a proper internal patch or a professionally installed plug-and-patch repair |
| Tire is low but still holding air | A slow leak may come from a valve, tread puncture, or wheel-related issue | Inflate to the correct pressure, locate the leak, and have the cause inspected before relying on the tire |
| Sidewall is cut, split, or bulged | Flexible rubber can no longer retain air or support the vehicle reliably | Do not attempt a permanent repair; replace the tire |
| Damage is in the wheel or bead area | The tire may lose pressure or separate from the wheel | Stop using the wheel and have both tire and wheel inspected |
| Tread is worn away | The tire cannot provide the intended traction, even if the puncture itself can be sealed | Replace the tire rather than restoring an unsafe, worn tire |
What causes a tire to lose air
Punctures are the most familiar cause, but they are not the only reason a vehicle can end up with a low or flat tire. The location, size, and shape of the damage matter more than the fact that the tire is empty.
A sharp object can puncture the tread and remain lodged in the rubber. A smaller object may create a slow leak that is difficult to find until the tire is noticeably soft. Debris can also cut into the tread, while a damaged valve stem can leak around its base or through the cap area. A tire can also lose air slowly through normal aging or an imperfect installation.
Damage to the wheel can resemble a tire problem. A dented or corroded rim may allow air to escape around the bead. A hard impact can damage the tire structure, the wheel, or both. In these cases, replacing or repairing only the visible puncture will not solve the underlying issue.
Readers should also distinguish a leak from a tire that has simply lost pressure over time. If a tire needs air repeatedly, the answer is not always to add more air. The correct response is to find why the pressure is disappearing.
- Sudden loss: A large puncture, major impact, severe bead damage, or split in the tire can cause rapid deflation.
- Gradual loss: A small tread puncture, leaking valve, aging rubber, or wheel issue may cause a slow pressure drop.
- Uneven wear or pulling: These symptoms can point to alignment, inflation, or suspension problems rather than a simple leak.
- Visible tire damage: Cuts, bulges, exposed cords, or tread separation make replacement the safer choice regardless of whether air can be added.
Tire pressure should be checked against the information on the vehicle’s door-jamb placard rather than the maximum molded into the tire sidewall. The placard reflects the vehicle maker’s intended cold-tire pressure for the vehicle and its load. The sidewall maximum is a limit, not a recommended everyday setting.
How to handle a flat tire safely at the roadside
The first priority is preventing a second accident. Move the vehicle as far from active traffic as practical, switch on hazard lights, and place warning devices where they will not create another hazard. If the vehicle is on a highway shoulder, remain behind a barrier if one is available. Never begin a tire change in an unsafe position merely to save time.
Slow the vehicle before it reaches the flat. Sudden braking or sharp steering can damage the tire and wheel or cause a loss of control. If the tire is completely flat, pull away without making abrupt turns. Once stopped, secure the vehicle according to the owner’s manual and follow its instructions for the jack, wheel positions, and lug-nut sequence.
- Confirm the problem. Locate the affected tire and check whether the cause is obvious, such as a nail, screw, embedded glass, or visible sidewall damage. Do not pull out an object until you are ready to inspect the tire and understand whether doing so affects the evidence needed for a possible warranty or insurance claim.
- Check the spare and tools. Confirm that the spare is present, appropriately sized, and suitable for temporary use. Locate the jack, lug wrench or wheel bolt tool, wheel chocks, and warning devices.
- Loosen the wheel fasteners slightly. If the vehicle manual permits it, loosen the fasteners before lifting. This helps prevent the wheel from binding as it comes off.
- Raise the vehicle correctly. Place the jack at the specified lifting point. Raise it only far enough for the tire to clear the surface.
- Remove and inspect the wheel. Take the wheel off and examine the tire, sidewall, bead, and wheel. Check that the spare matches the vehicle’s required configuration.
- Install the spare. Fit the spare, tighten the fasteners by hand, lower the vehicle, and tighten in the recommended sequence with the vehicle’s own wheel-pattern guidance.
- Store the damaged tire safely. Keep the wheel and tire together so a repair shop can inspect them. If the tire was repaired temporarily, clearly note what product was used and where the leak appeared.
Do not place hands or fingers behind a wheel while it is mounted and being loosened. Once the vehicle is supported, the wheel can shift unexpectedly. Also avoid improvising with objects that are not rated or shaped for the specific lug fastener. Wheel locks may require a special key, and the correct tool matters.
| Tool or option | Best use | Important limitation |
|---|---|---|
| Spare tire | Restoring mobility after a wheel can be removed safely | It may be limited-speed or temporary, and it will not fix the damaged tire |
| Inflator | Restoring pressure in a slow leak or preparing a tire for inspection | Air pressure alone does not repair a puncture or damaged wheel |
| Tire sealant | Emergency sealing of certain small tread punctures | Usually temporary; it may hide the puncture and can complicate a shop repair |
| Plug-and-patch kit | Sealing a suitable tread puncture from inside the tire | It requires proper cleaning and inspection, and a plug alone is not always the preferred permanent repair |
| Roadside assistance | Changing or moving a vehicle when the situation is unsafe or the equipment is unavailable | It may be necessary even when a spare is present |
Patch, plug, sealant, or replacement: choosing the appropriate repair
The repair method depends on where the tire is damaged and whether the tire, tread, bead, and wheel remain structurally sound. A tire can look usable from the outside while having damage that is only visible after dismounting it. That is one reason a professional inspection matters.
A patch is installed from the inside of the tire. The puncture area is cleaned and prepared, adhesive is applied, and the patch is pressed into place so it covers the inner liner opening. Because the injury is repaired from the inside, a patch covers the full channel through the tire rather than only the outer opening.
A plug is inserted from the outside through the puncture channel. It can be convenient because the tire may not need to be removed from the wheel. However, a plug that is simply pushed into the hole does not restore the inner liner in the same way as an internal patch. A combination plug-and-patch repair can provide both a path through the puncture and coverage on the inside.
Sealant is different again. Liquid sealant travels inside the tire and is designed to close small punctures from within. It may help a driver reach a repair location, but it does not restore a cut sidewall, separated bead, damaged cord, or badly worn tire. It can also make the inside of the tire and wheel messy, and the tire may need to be cleaned before a permanent repair.
| Repair option | Best suited to | Why it may be rejected |
|---|---|---|
| Internal patch | A small, isolated tread puncture in an otherwise sound tire | The puncture is near the sidewall, shoulder, or bead; the tire is worn or damaged; multiple repairs make the area unsafe |
| Plug-and-patch combination | A suitable tread puncture where the tire must remain mounted for inspection or repair | The shop determines the tire or puncture is unsuitable for the repair |
| Plug only | Selected temporary or service applications where the repair method is approved | A shop may prefer an internal patch or combination repair after dismounting the tire |
| Liquid sealant | Emergency mobility for a small puncture that matches the product’s limits | The puncture is too large, located in an unsafe area, or the tire has structural damage |
| Tire replacement | Sidewall damage, bead damage, worn tread, exposed cords, or an unrepairable puncture | The tire is safe to repair and replacement would not improve safety or tread life |
Do not judge the repair solely by whether the tire holds air. Pressure retention is only one part of the assessment. The repair should also restore the tire’s ability to retain shape, hold the bead, support load, and resist heat. A tire that leaks air, shows a bulge, has a torn bead, or continues losing pressure after a repair should not be returned to service.
When tire sealant is useful—and when it is not
Tire sealant can be helpful after a small tread puncture when the driver must reach a safe repair location. It is commonly supplied in liquid form or in a pressurized can that also adds air. Some vehicle manufacturers include sealant and an inflator in the trunk or under the cargo floor.
The puncture must be within the limitations stated for the product. Damage near the shoulder or sidewall is especially concerning because those areas flex and carry the tire under load. A sealant cannot correct a separated tread, a bulge caused by belt damage, a cut bead, or a compromised wheel. It also cannot restore adequate tread depth.
The background distinctions between tire deflation and common causes are summarized in this explanation of punctures and tire deflation, which provides useful background for this point. A flat tire is a deflated pneumatic tire, and driving on one can damage the tire, wheel, hub, or other vehicle components. That is why gradual loss of speed and a controlled move to a safe location are safer than continuing to drive normally.
Some products are designed for use through the valve, while others connect directly to the tire. The vehicle’s own sealant system may have instructions specific to its design and equipment. Follow those instructions and do not assume that any sealant container will work with any valve or wheel.
- Read the product limitations before use, including puncture size and location restrictions.
- Inspect the tire for visible damage before inflating or sealing it.
- Remove the source of the puncture when that can be done safely.
- Inflate only enough to restore safe pressure and travel to a repair location.
- After using sealant, tell the repair shop so it can account for the sealant when removing and inspecting the tire.
- Arrange a permanent inspection rather than treating the emergency sealant as the final repair.
Driving speed after an emergency repair deserves particular care. If the tire has lost substantial pressure, even a successful sealant repair may not restore the tire to its normal operating condition. The vehicle manufacturer may specify a reduced speed limit for temporary use. If the instructions are unavailable or the tire feels unstable, the safer choice is roadside assistance rather than continuing under your own power.
Do not use sealant to inflate a visibly damaged tire and then set the pressure to normal as though the underlying problem has been solved. The added air creates the appearance of a usable tire, but it does not guarantee that the casing, bead, and wheel are sound.
Inspecting the tire and wheel before the vehicle moves again
A tire repair is not complete until the tire, wheel, and vehicle have been checked for related damage. A low tire may have exposed the rim to the road long enough to create a dent, distortion, or leak around the bead. It may also have caused uneven wear that changes how the vehicle handles.
Begin with the tread across its full width. Look for cuts, deep grooves, exposed fabric or cords, tread separation, bulges, and any puncture in the shoulder. Check the sidewall for slashes, scuffs that expose layers, bulges, cracks, or a distorted shape. Inspect the bead and the area where the tire meets the wheel. Do not overlook a tire that looks normal from the top but is damaged along the inner shoulder.
Next, inspect the wheel. Check for visible bends, cracks, deep corrosion near the bead seating area, and evidence that the tire has ridden on the ground. A wheel that has been run flat may need correction, replacement, or professional inspection before it is reused.
For the spare tire, confirm four important points:
- The spare is the correct size and configuration for the vehicle.
- Its speed rating is appropriate for the temporary use specified by the vehicle manufacturer.
- It is inflated enough for use but does not exceed its permitted limit.
- The spare, space-saver, and full-size designs are not treated as interchangeable without confirmation.
After installation, tighten the wheel fasteners with the correct tool and follow the vehicle’s prescribed tightening sequence. If the vehicle uses an impact wrench, final tightening should still be checked with a torque wrench when practical because an impact tool does not guarantee the correct final torque.
Pay attention to how the vehicle behaves after leaving the roadside. A pull to one side, vibration, steering-wheel shimmy, unusual noise, or poor braking can point to a wheel, tire, alignment, hub, or brake issue. Adjacent safety-system work may also matter after a tire has run low or struck debris. This overview of brake repair decisions explains why those symptoms should not be dismissed as tire problems.
DIY tire repair or professional service?
A tire change at the roadside is a practical emergency skill, but a permanent puncture repair is a different task. Dismounting the tire, inspecting the inner liner, checking the bead and wheel, and identifying hidden damage requires appropriate tools, procedures, and judgment. A puncture that looks small from the outside can be at an angle, close to the shoulder, or surrounded by other damage.
DIY roadside work makes the most sense when the damage is minor and the vehicle can be parked safely, the correct spare and tools are available, and the driver knows the vehicle’s lifting and tightening procedures. Professional service is the better choice when the puncture is large, the tire was completely flat, the cause is unclear, the sidewall or bead is affected, or the wheel may be damaged.
| Factor | DIY roadside response | Professional service |
|---|---|---|
| Location | Safe, level, well-lit area away from traffic | Shop or mobile service with appropriate equipment |
| Puncture | Small, obvious tread puncture in an otherwise sound tire | Any puncture requiring dismounting, internal inspection, or uncertain repair |
| Tire condition | No sidewall, shoulder, bead, or tread damage | Visible or hidden structural damage |
| Wheel condition | No obvious bend, crack, severe corrosion, or bead damage | Possible impact damage, distortion, or air leakage |
| Equipment | Correct jack points, lug tool, spare, and safe lifting knowledge | Proper tire machine, inspection tools, balancing equipment, and repair procedures |
A tire shop can do more than close a hole. It can inspect both inner and outer surfaces, check the wheel, verify whether the repair area is sound, and balance the tire after remounting. The tire should also be checked for age-related cracking and remaining tread life. If the same tire has already received several repairs in a small area, the shop may recommend replacement because there may not be enough sound material left to support another repair.
Owners should keep the service record. A receipt or digital record that identifies the repair method, tire location, and any recommendation for replacement makes future decisions easier. It is also useful when checking whether a related warranty or assistance program applies.
After the repair: pressure, behavior, and maintenance checks
After a permanent tire repair, the tire needs to be reinflated to the vehicle’s recommended pressure. If the repair involved removing the tire from the wheel, the tire may need to be balanced afterward. Ask the shop to confirm the final pressure and inspect the wheel seating.
Before leaving the shop, take a short drive and note any vibration, pulling, steering resistance, or abnormal noise. These may indicate that the wheel is not seated correctly, the tire is not balanced, or another issue needs attention. Return for service if the behavior does not resolve as expected.
Monthly pressure checks help reveal slow leaks before a tire becomes visibly low. Check pressures when the tires are cold, before driving if practical, and use the same gauge each time. A tire can lose pressure over time even without a clear puncture, so a gradual change should not be ignored indefinitely.
Visual checks are equally important. Look for uneven tread wear, objects embedded in the tread, sidewall damage, and tires that look underinflated when the vehicle is parked. Rotate tires according to the vehicle manufacturer’s schedule and pay attention to whether the same tire repeatedly loses air or wears faster than the others.
Routine service also helps catch problems before they become roadside emergencies. Fluid levels, filters, belts, brakes, and other wear items belong on the vehicle’s maintenance schedule, and tire condition should be reviewed during that work. This guide to full synthetic oil changes is one example of the broader maintenance tasks that should follow the owner’s specified schedule rather than an arbitrary interval.
- Check cold tire pressure monthly and before long trips.
- Inspect tread, sidewalls, and the space around each tire for embedded debris.
- Check the spare tire so it is usable when needed.
- Follow the vehicle’s tire rotation, alignment, and replacement intervals.
- Investigate repeated pressure loss instead of repeatedly adding air.
- Ask for an internal tire inspection when a puncture is near the shoulder, unusually large, or part of a pattern of repeated failures.
Frequently asked questions
Can every flat tire be repaired?
No. A small, isolated puncture in the tread can sometimes be repaired if the tire and wheel are otherwise sound. Sidewall cuts, bead damage, bulges, exposed cords, worn tread, or damage in the shoulder usually make replacement the safer option.
Is a tire plug the same as a patch?
No. A plug fills the puncture channel from outside the tire, while a patch covers the opening from inside the tire. A combination repair uses both approaches. The appropriate method depends on the puncture’s location and the tire’s condition.
Can I drive on a flat tire until I reach a tire shop?
Driving on a completely flat tire can destroy the tire and damage the wheel, hub, or other components. If the tire is merely low, drive slowly to the nearest safe location, but stop if the vehicle pulls, the steering feels strange, or the tire continues to lose air.
Does tire sealant permanently fix a puncture?
Usually, no. Sealant is intended mainly for temporary mobility in suitable small tread punctures. It does not repair structural sidewall or bead damage and may need to be removed before a professional can inspect and repair the tire properly.
How long can I drive after using tire sealant?
There is no universal distance. The puncture size, tire condition, amount of air lost, vehicle weight, and product instructions all matter. If the tire remains unstable, loses pressure quickly, or shows visible damage, stop and request roadside assistance rather than continuing.
Can a wheel be damaged while a tire is flat?
Yes. Running on a flat can dent or distort the rim, damage the bead area, and cause the tire to separate from the wheel. The wheel should be inspected even when the visible tire puncture appears to be the only obvious problem.
Should I repair an old tire or buy a new one?
Age and tread condition can matter as much as the puncture. A tire with extensive cracking, inadequate tread, previous repairs in the same area, or structural damage may not be appropriate for repair. A tire shop can evaluate the casing and recommend the safest option.
Why does my tire keep losing air?
Possible causes include a slow tread puncture, a leaking valve, aging rubber, an imperfect tire installation, or a problem around the wheel bead. Repeatedly adding air does not identify the cause, so the tire should be inspected before it fails again.
Is it safe to use a spare tire at highway speed?
Only if that spare is designed for that use. Some compact spare tires are limited to lower speeds and shorter distances. Check the spare’s sidewall markings and the vehicle’s instructions. If they are missing or unclear, obtain roadside assistance instead of assuming the spare is unrestricted.
What should I check after a tire repair?
Confirm that the tire is seated correctly, inflated to the vehicle’s recommended pressure, and balanced if it was dismounted. Drive cautiously and watch for vibration, pulling, noise, or poor braking. Repeat an air-loss check after a short distance and return to the shop if any concern remains.

Leave a Reply